Coolsculpting VS Cryolipolysis: What is the Difference?
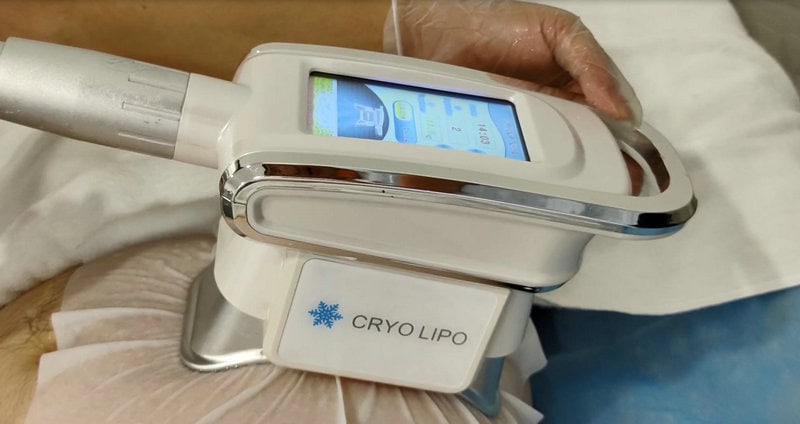
CoolSculpting and cryolipolysis refer to the same medical procedure that reduces fat cells in the body through freezing. Specifically, cryolipolysis is the scientific term that describes the process of fat freezing, while CoolSculpting is a branded name for this procedure, much like Google is a well-known brand of searching engine.
Overall, cryolipolysis and CoolSculpting refer to the same nonsurgical fat reduction treatment which effectively reduce localized fat deposits on areas of the body that are resistant to diet and exercise. Procedurally, they are identical – the only difference is that CoolSculpting is the proprietary brand name. Overall, cryolipolysis and CoolSculpting refer to the same nonsurgical fat reduction treatment.
Why You Can’t DIY Cryolipolysis at Home
Cryolipolysis is a FDA-approved cosmetic procedure which designed to tackle those stubborn fat areas that don’t seem to budge with diet and exercise in fat loss.
You might think about DIY this procedure by CoolSculping machine at home, because the professional treatments can be quiet costly. However, you should be aware that the provider of this treatment should have a license or be trained to do this for a long time.
So, you better NOT DIY Cryolipolysis by yourself at home. Here are the questions you might concern:
1. Is it possible to achieve similar results with DIY cryolipolysis as with professional treatments?
Achieving similar results to those of professional treatments is unlikely with DIY cryolipolysis. Professional devices are FDA-approved and operated by trained personnel, ensuring targeted and controlled fat reduction, which at-home methods can’t guarantee.
2. What should one expect from at-home CoolSculpting before and after the procedure?
If you really want to do this by yourself, before attempting at-home CoolSculpting, research the device’s safety and instructions. After the procedure, any visible changes in fat reduction might be minimal and could take time, unlike the more immediate and consistent results seen with professional treatments.
3. Are there any affordable CoolSculpting alternatives for home use?
While there are less expensive at-home devices marketed as alternatives to CoolSculpting, their efficacy and safety are typically not on par with the professional procedures offered in clinics. Furthermore, most of them are not the real CoolSculpting machines but the inmitate ones. The inmitator machine will not work and has highly riscks to make perment danger to your body.
4. What are the risks associated with using DIY fat freezing methods?
Using DIY fat freezing methods poses risks including skin burns, frostbite, and uneven fat reduction. Unlike controlled professional treatments, DIY methods lack precise temperature regulation and can lead to undesired outcomes or injury.
DIY Procedures That You Shouldn’t Do: At-Home Ice Treatment
Ice treatment involves applying ice packs, frozen gel packs, bags of frozen vegetables, or other cold materials to the area you want to reduce the fat. However, the cold can help reduce pain, swelling, and inflammation by constricting blood vessels, decreasing metabolic activity, and numbing nerve irritation but it can not help you lose weight.
Why At-Home Ice Treatment Doesn’t Work
- Lack of Precise Temperature Control: CoolSculpting machines use patented technology to precisely monitor and control the cooling temperature to selectively target fat cells without damaging skin and surrounding tissues. Ice packs cannot maintain the ideal cooling range required.
- No Tissue Protection: CoolSculpting uses gel pads, skin protectants, and vacuum applicators to protect the skin and ensure fat is pulled to the surface for effective cooling. DIY methods lack these safety mechanisms.
- Inconsistent Cooling: CoolSculpting applicators deliver consistent, evenly distributed cooling. Ice packs warm up quickly and provide uneven cooling that is ineffective for fat reduction.
- Inability to Target Fat Layer: The CoolSculpting vacuum applicators pull fat up toward the cooling panels. At-home methods cannot isolate and target the fat layer effectively.
Risks of At-Home Ice Treatment
Attempting DIY fat freezing with ice packs or frozen materials can lead to serious risks and side effects, including
- Frostbite and permanent skin/tissue damage
- Numbness and nerve damage
- Pain and discomfort
- Blisters and scarring
- Need for medical treatment to repair damage
Reputable medical sources strongly advise against attempting at-home CoolSculpting due to the lack of effectiveness and potential dangers.
Required Equipment and Setup
We strongly do not recommend you do this surgery at home, but if you must do it, you can refer to the following precautions.
When considering coolsculpting at home, it’s essential to be equipped with the correct tools and understand the coolsculpting treatment, coolsculpting procedure, how coolsculpting work and how to set up your space for safety and effectiveness.
Selecting the Right Applicators
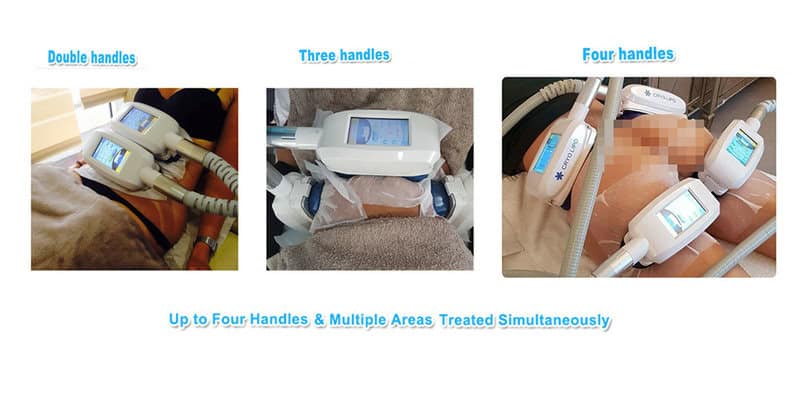
To target specific areas of your body, you’ll need the appropriate applicators. These devices come in various shapes and sizes, designed to accommodate different body parts. Make sure the applicators you choose provide adequate suction to maintain close contact with your skin throughout the treatment.
- Large Applicators: best for abdominal fat and other large areas.
- Small Applicators: suitable for smaller sections like the arms or chin.
Ensure that your device is reputable and ideally that it follows similar principles of professional-grade equipment, understanding that home devices may not offer the same precision or results.
Preparing the Skin and Treatment Area
Before beginning your session, prepare the skin to protect it and optimize the treatment:
- Cleanse – Clean your skin thoroughly to remove any oils or lotions that might affect the suction.
- Gel Pad Placement – Apply a gel pad to the target area. This pad acts as a barrier between the skin and the applicator, ensuring your comfort and protecting your skin from extreme cold.
- Applicator Positioning – Position the applicator on the gel pad-covered area, making sure the suction holds the device firmly throughout the treatment.
Remember to follow the specific instructions provided with your equipment for the best results and to avoid potential harm. Always prioritize safety over all else when attempting any form of DIY treatment.
Procedure and Technique
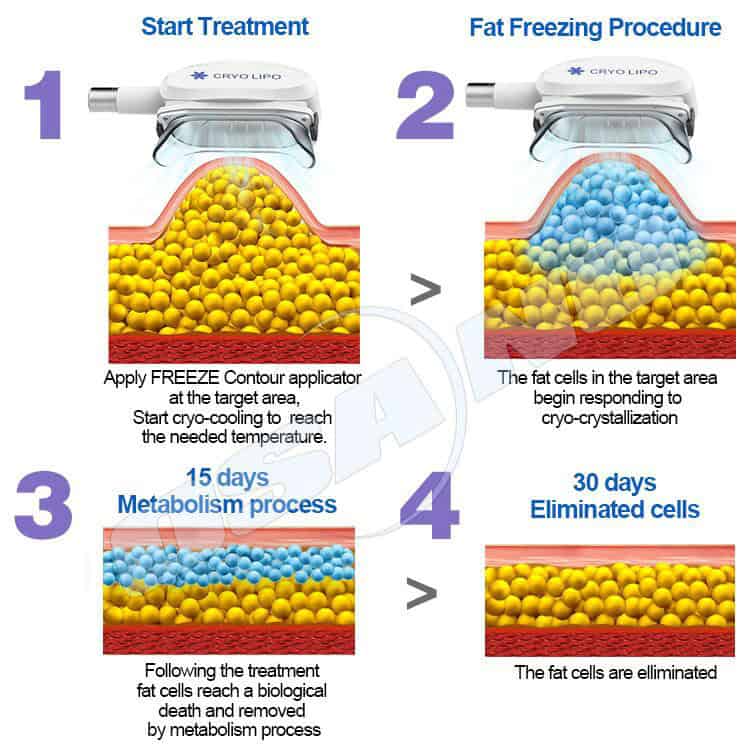
Applying the Device Correctly
Freezing fat at home typically involves a device that applies cold temperatures to the targeted area. It’s essential to position the device precisely, ensuring good contact with the skin. The device often works through suction to pull the fatty area into the applicator for even cooling. Here’s what you need to do:
- Make sure the area is clean and dry.
- Apply a gel pad if provided, to protect your skin.
- Position the applicator firmly to ensure proper suction.
Managing Treatment Duration and Temperature
Properly managing the duration and temperature of your at-home treatment is vital for safety and effectiveness:
- Do not exceed the recommended time (usually around 35-60 minutes).
- Ensure the device maintains a safe, consistent temperature, as extreme cold can cause tissue damage.
Cold temperatures are critical in fat reduction, but too cold can cause harm, so always follow the manufacturer’s guidelines.
Ensuring Proper Aftercare
Post-treatment care is important to help your body recover:
- Gently massage the treated area to alleviate any tingling sensations.
- Expect some redness and swelling—use mild analgesics if discomfort occurs.
- Monitor your skin for any unusual reactions and seek medical advice if necessary.
Remember to monitor for and address any signs of complications promptly.
Potential Risks and Side Effects
It’s important for you to understand that while the idea of achieving fat reduction at home may seem convenient, the risks involved with at-home cryolipolysis could outweigh the potential benefits. Incorrect application can lead to side effects or serious complications.
Identifying Common Reactions
When you try procedures like cryolipolysis at home, you may experience common reactions such as numbness or bruising in the treated area. These reactions typically resolve on their own but can be uncomfortable. Here’s what you should look out for:
- Pain or Tenderness: A sensation of mild to moderate pain during or after the process.
- Numbness: A temporary loss of sensation that can last for days or weeks.
- Bruising: Discoloration on your skin resulting from the cold application.
It’s essential to monitor these reactions to ensure they diminish rather than worsen.
Recognizing Serious Complications
While less common, certain serious complications from DIY fat freezing could pose significant health risks:
- Frostbite: You could accidentally freeze the skin, leading to ice burns or frostbite.
- Paradoxical Adipose Hyperplasia (PAH): A very rare effect where the treated fat cells increase rather than decrease, resulting in a bulge in the treated area.
If you suspect any serious complication, it’s crucial to seek medical attention. Self-treatment increases the possibility of overlooking warning signs that a professional wouldn’t miss.
Comparing Professional To At-Home Solutions
Understanding the Limits of DIY Cryolipolysis
DIY Cryolipolysis as we told before often involves makeshift methods using ice cubes or other freezing agents. However, performing these procedures at home has several drawbacks.
- Precision: It lacks the precision that professional CoolSculpting equipment offers.
- Effectiveness: There is no guarantee that fat cells are effectively targeted and eliminated.
- Safety Risks: You risk damaging your skin due to frostbite or other cold-related injuries.
Benefits of a Professional Procedure
Professional CoolSculpting: Performed by a plastic surgeon or a board-certified cosmetic dermatologist, provides distinct advantages.
- Technology: Utilizes advanced technology capable of selectively targeting fat cells while preserving surrounding tissues.
- Outcomes: More consistent and noticeable results compared to at-home versions.
- Noninvasive: A genuine noninvasive procedure, unlike DIY methods that can potentially breach the skin.
- Insurance: Though not typically covered by insurance, professional treatments come with the reassurance of a healthcare provider’s oversight.

